Redcurrant Jelly

This is one of the easiest preserves to set given the high quantity of pectin in the redcurrants. You will need rather a lot of redcurrants to make a decent-seized batch however. In my experience, a pound of fruit makes roughly 2 jars of jelly at the end of the process.

Ingredients

Redcurrants
White sugar

You will also need clean jars

Method

  1. Pick over and wash the redcurrants making sure they are clean and bug free then place them in a large heavy based pan. A jam pan is ideal but if not just a nice big saucepan will do.
  2. Add a tablespoon of water to the pan and simmer the redcurrants gently until they are tender and bursting.
  3. Strain the redcurrants through a jelly bag without squeezing. This will take a few but the jelly will need no attention at this point so you can go off and do other things. If you don’t have a jelly bag you can either use a clean tea towel stretched and secured over a bowl, or a fine sieve.
  4.  Once you have collected the juice you need to measure it back into your large jam pan. For each pint of juice add a pound and a quarter of sugar.
  5. Bring the juice and sugar gradually to the boil stirring continuously until all the sugar is dissolved.
  6. Place your clean jars and their lids into a 100 degree oven to sterilise.
  7. While your jelly is cooking it will produce a foamy scum which will rise to the top. Skim this off with a large metal spoon.
  8. Simmer until setting point is reached. My preferred method of determining this is to drop a small amount of jelly on a plate and push it with a fingernail. If it has reached setting point the surface will wrinkle.
  9. When setting point is reached, use a ladle to transfer your jelly into your clean hot jars. Place the lids on and screw them on tightly using a tea towel to avoid burning your fingers.
  10. Leave your jelly to cool at room temperature; if you’re using jars with “safety buttons” you should notice that when the jelly is cool the buttons will have been pulled down by the vacuum you have formed by putting the lids on the hot jars. Your jelly should now last at least until Christmas and if you’ve made too much it makes a great Christmas present.

The Best Dark Chocolate Brownies

August 2013

Ingredients

100g butter
175g dark brown sugar
125g dark chocolate
2 tablespoons golden syrup
2 eggs
1 teaspoon vanilla essence
150g plain flour
1 teaspoon baking powder
2 tablespoons cocoa powder

Method

  1. Line and grease an 8 inch cake tin and preheat oven to 160 degrees celsius.
  2. Gently melt the chocolate, butter, dark chocolate and syrup in a pan stirring continuously until all the ingredients are melted and combined. Remove from the heat and leave to cool.
  3. Beat the eggs and add the vanilla essence. Whisk in the cooled chocolate and butter mixture.
  4. Sieve in the dry ingredients and fold them in gently with a large metal spoon.
  5. Pour the batter into your tin and bake for around 60 minutes. Remember, an overcooked brownie is a disappointing brownie so make sure to remove it from the oven when it is still slightly liquid in the centre (it will solidify slightly as it cools). Cut into squares when cool and attempt not to eat the whole lot in one sitting.


Vanilla Shortbread

August 2013

Makes 16 small biscuits

Ingredients

130g Butter, softened
60g Caster sugar
190g plain flour
2 teaspoons vanilla essence

Method

  1. Grease and line a baking sheet and preheat your oven to 170 degrees celsius
  2. Cream together the butter and sugar and add the vanilla essence
  3. Add the flour and stir in until you have a uniform dough. Don’t overwork the mixture at this stage or you will exercise the gluten in the flour and make your shortbread tough.
  4. Roll out the dough (around 1cm thick) and use a cutter to cut out your biscuits. Lay them on your baking sheet and bake for 15 to twenty minutes or until pale golden in colour.
  5. Cool on a wire rack and dust with caster sugar before serving. 

The Pudding Bar

The easiest way of catering pudding for a large group that brings out the creative side in everybody.

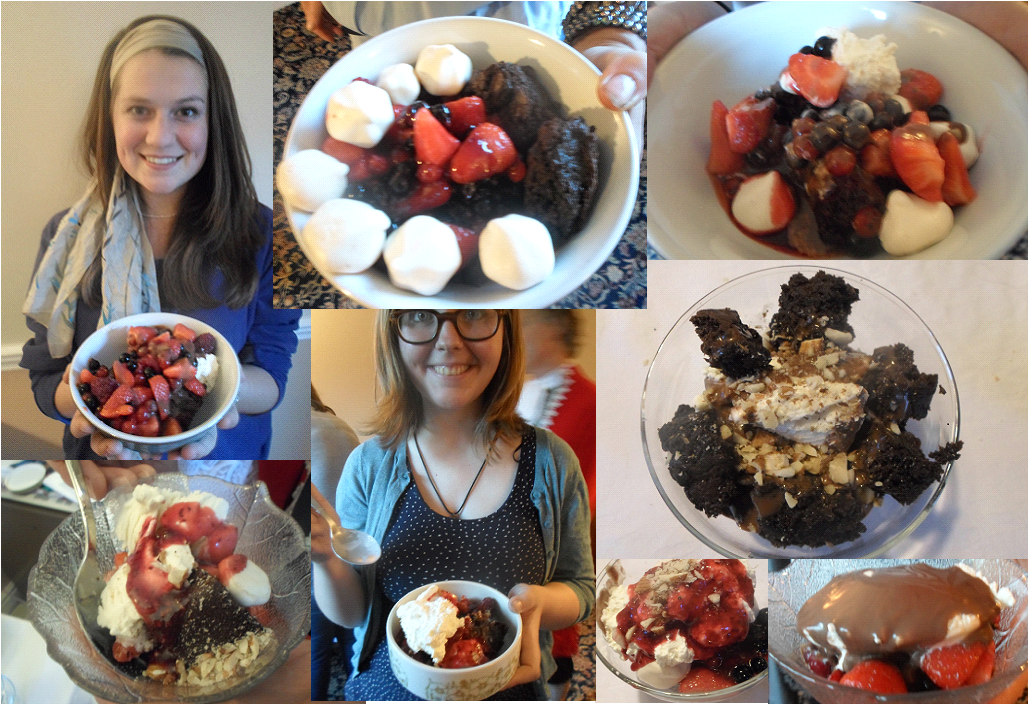
The secret to the success of the pudding bar is keeping in mind texture and the balance of sweetness in the potential desserts your guests could make. Below are some examples of what people came up with:

We all remember the unbridled joy of unlimited ice cream sundaes at chain restaurants: a tiny china bowl and your choice of sprinkles and sauces. Well, I thought, why not scale up the concept? Instead of the stress of cooking 3 or 4 different desserts (with guests’ dietary requirements and foibles in mind of course) why not just make the components? And thus the idea for the pudding bar was formed.

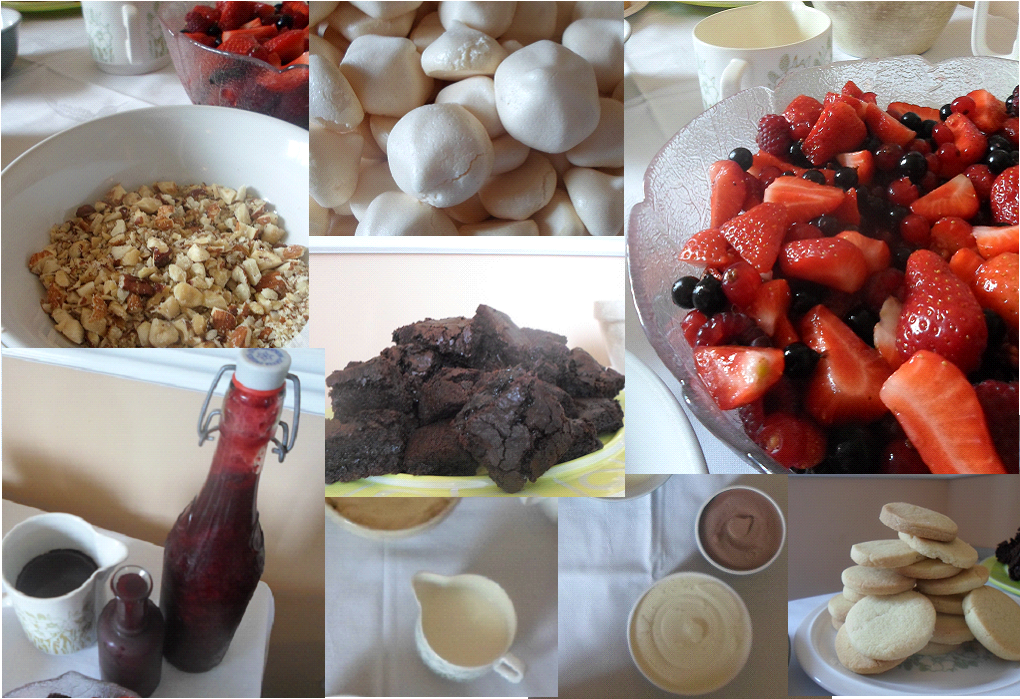
So I thought, what makes up my favourite puddings? In my opinion, the best puddings contain 3 elements: something sweet, something creamy and something fresh. For my sweet selection I made brownies, meringues and shortbread biscuits.  My creamy constituents included cream (pouring and whipped), yoghurt and ice cream (chocolate and vanilla). For freshness I provided summer berries from the garden, blackcurrant coulis with cassis, chopped nuts and a bitter chocolate sauce.

Me and my selection from the Pudding Bar :brownie, berries, vanilla ice cream and nuts in case you were interested. 

This was the easiest pudding-making for 18 people has ever been and I got some of the most glowing compliments I have ever received. So for your next party, why not get people to assemble their own favourite pudding and take some of the pressure off so you can enjoy yours more too?